Introduction
This Gesture-Based EC2 Instance Management project is a simple and beginner-friendly Project that allows users to Launch and Terminate EC2 instances on AWS☁️ using finger gestures✌️🖐️ captured by a computer’s webcam📷.
With this project, even individuals with limited experience can showcase their skills in computer vision, machine learning, and AWS integration.
By following the step-by-step instructions, you can create this innovative application and demonstrate your ability to build interactive projects.
Prerequisites
Before getting started with the project, make sure you have the following prerequisites installed:
Anaconda🐍: Anaconda is a Python distribution that simplifies package management and provides an environment for running the project.
AWS CLI💻: The AWS Command Line Interface allows you to interact with AWS services from the command line. Install it to configure your AWS account and access the necessary credentials.
Installation
To set up the project on your local machine, follow these steps:
- Clone the GitHub repository containing the project files:
git clone [https://github.com/krishabh080/Launching_ec2_instance_with_fingers_using_AI_and_ML.git]
2. Navigate to the downloaded repository on your local machine.
3. Install the required Python libraries by running the following command:
pip install -r requirements.txt
This command will install the necessary libraries such as scikit-learn, numpy, pandas, matplotlib, boto3, opencv-python, urllib3, cvzone, and mediapipe.
Configuration
Before running the project, a few configuration steps need to be performed:
Creating an IAM User and Configuring AWS CLI
To interact with AWS services programmatically, you need to create an IAM user and configure the AWS CLI on your system. Here’s a step-by-step guide:
Go to the IAM dashboard in the AWS Management Console.
Click on “Users” in the sidebar menu and then click on the “Add user” button.
Provide a username for the IAM user and choose the programmatic access type. Click “Next” to proceed.
Attach the required policies to the user. For this project, you can attach the “AmazonEC2FullAccess” policy to enable EC2 instance management. Review the configuration and click “Next”.
Skip the tags section and click “Next”.
On the “Review” page, verify the details and click “Create user”.
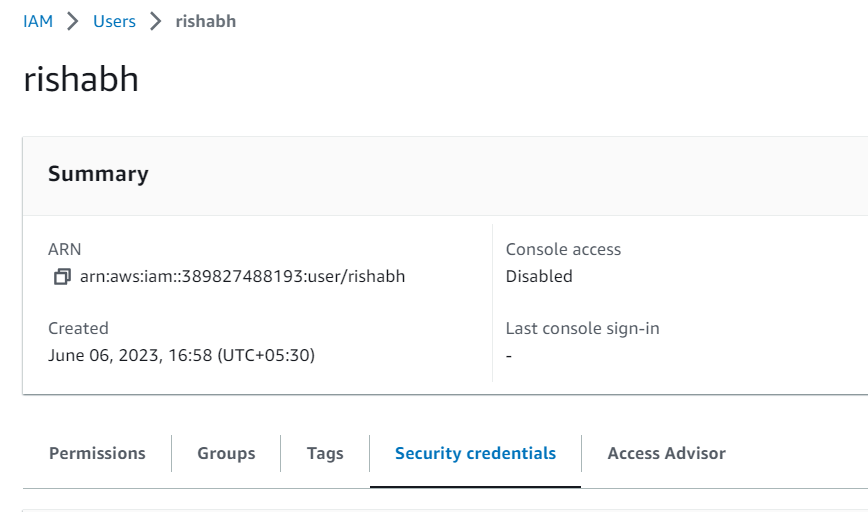
After the user is created, go to Security Credentials to create Access Key ID and Secret Access Key. These credentials will be used to configure the AWS CLI on your machine.


8. Copy Access key and Secret key
9. Open a command prompt or terminal and run the following command:
aws configure

Enter the Access Key ID, Secret Access Key, default region name, and output format when prompted. This will configure the AWS CLI to use your IAM user’s credentials.
Creating a Security Group and Adding Inbound Rules
A security group is a virtual firewall that controls inbound and outbound traffic for EC2 instances. Follow these steps to create a security group and add the necessary inbound rules:
Go to the AWS Management Console and navigate to the EC2 service.
Click on “Security Groups” in the sidebar menu.
Click on the “Create security group” button.
Provide a name and description for the security group.
In the “Inbound rules” section, click on “Add rule” to define the inbound traffic rules. Specify the protocol (e.g., TCP, UDP), port range, and source IP or CIDR range based on your requirements. Add as many inbound rules as needed.
Once you have defined all the inbound rules, click on the “Create security group” button to create the security group.
After the security group is created, note down its Security Group ID. This ID will be used in the code to allow access to EC2 instances.
Choosing an Amazon Machine Image (AMI)
Go to the AWS Management Console and navigate to the EC2 service.
Click on “Instances” in the sidebar menu.
Click on the “Launch instance” button.
In the “Step 1: Choose an Amazon Machine Image (AMI)” section, select an AMI that suits your requirements. You can choose from various pre-configured AMIs provided by AWS or select a community AMI.
Once you have selected the AMI, note down its AMI ID. This ID will be used in the code to specify the AMI for launching EC2 instances.
Explanation of the Code
import cv2
cap = cv2.VideoCapture(0)
allOs = []
import boto3
ec2 = boto3.resource("ec2")
The code begins by importing the necessary libraries: cv2 for capturing video frames, boto3 for interacting with AWS EC2 services, and cvzone.HandTrackingModule for hand tracking capabilities using mediapipe.
A video capture object, cap, is created to access the webcam feed. The allOs list is initialized to keep track of launched EC2 instances. The ec2 resource object is created using the boto3.resource method to enable interactions with the AWS EC2 service.
def myOslaunch():
    instances = ec2.create_instances(
        ImageId="AMI_ID_HERE",
        MinCount=1,
        MaxCount=1,
        InstanceType="t2.micro",
        SecurityGroupIds=["SECURITY_GROUP_ID_HERE"]
    )
    myid = instances[0].id
    allOs.append(myid)
    print(myid)
    print("total os:", len(allOs))
The myOslaunch() function launches a new EC2 instance using the specified parameters. The ImageId parameter should be replaced with the desired AMI ID. The MinCount and MaxCount parameters are set to 1 to launch a single instance. The InstanceType parameter defines the instance type, which can be modified as per requirements. The SecurityGroupIds parameter should be updated with the appropriate security group ID. The instance ID of the launched instance is appended to the allOs list for tracking purposes.
def osTerminate():
    if len(allOs) != 0:
        osdelete = allOs.pop()
        ec2.instances.filter(InstanceIds=[osdelete]).terminate()
        print("total os:", len(allOs))
The osTerminate() function terminates the most recently launched EC2 instance. It checks if there are any instances in the allOs list before executing the termination process. The instance ID of the last launched instance is popped from the list, and the terminate() method is called to terminate the corresponding EC2 instance.
detector = HandDetector(maxHands=1)

while True:
    status, photo = cap.read()
    hand = detector.findHands(photo, draw=False)
    cv2.imshow("my photo", photo)
    if cv2.waitKey(100) == 13:
        break
    if hand:
        lmlist = hand[0]
        totalFinger = detector.fingersUp(lmlist)
        if totalFinger == [0, 1, 1, 0, 0]:
            print("launching a new instance")
            myOslaunch()
        elif totalFinger == [0, 1, 0, 0, 0]:
            print("Terminating the instance")
            osTerminate()
        else:
            print("show correct fingers")

cv2.destroyAllWindows()
allOs
cap.release()
The code continues by creating an instance of the HandDetector class from the cvzone.HandTrackingModule library. This class enables hand tracking capabilities using mediapipe.
Inside the while loop, the code captures frames from the video feed using cap.read(). The findHands() function is called to detect hands in the captured frame. The resulting hand information is stored in the hand variable.
The current frame is displayed using `cv2.imshow
Usage
After completing the installation and configuration steps, you can run the main code script to control EC2 instances using finger gestures. Follow these steps:
Open the Python script file named
code.pyin a text editor.Update the
myOslaunch()function with the appropriate values:
Replace
"AMI_ID_HERE"with the AMI ID you selected from the AWS console.Replace
"SECURITY_GROUP_ID_HERE"with the Security Group ID you created.
3. Save the changes and close the file.
4. Open a command prompt or terminal and navigate to the project directory.
5. Run the following command to execute the code:
python code.py
6. The code will start capturing frames from your webcam. Place your hand in front of the camera, and the system will recognize the finger gestures you make.
7. If you make a gesture with the index and middle fingers up, the code will launch a new EC2 instance.
8. If you make a gesture with only the index finger up, the code will terminate the most recently launched EC2 instance.
9. If the finger gesture does not match any predefined gestures, a message will be displayed to “show correct fingers”.
10. To exit the program, press the Enter key.
Conclusion
By harnessing the power of computer vision and machine learning, the system recognizes specific hand gestures and triggers actions such as launching or terminating EC2 instances.
Give this project a try and experience the power of gesture-based EC2 instance management firsthand. Start controlling your virtual servers with a wave of your hand!
— — — — — — — — — — — — — — — — — — — — — — —
To access the complete source code and project files, you can visit the GitHub repository: GitHub Repository Link.
If you have any questions or need further assistance, feel free to reach out to me at krishabh080@gmail.com. I’m happy 😄to help!🫂
