Getting Started with AWS CLI: A Beginner’s Guide to Command-Line Cloud Computing


There exist different methods to use AWS, each method has its own advantages and use cases, and the choice of method depends on the user’s needs and technical expertise.
Some Benefits of using AWS CLI are:
Faster and more efficient management of cloud resources
Flexibility and customization in workflows and commands
Better integration with other tools and services
Improved security and auditing using IAM policies and roles
Cost-effective management through resource optimization and automation
In this beginner’s guide, we’ll walk you through the AWS CLI basics and help you get started with this powerful tool for managing your cloud infrastructure.
This blog will include: installing AWS CLI, creating an IAM user, configuring the CLI, launching an ec2 instance, also how can we switch it on/off from CLI.
STEP 1: Installing the AWS CLI:
You can download and install the AWS CLI on your local machine. You can download the CLI from the official AWS website, here’s the link: https://docs.aws.amazon.com/cli/latest/userguide/getting-started-install.html
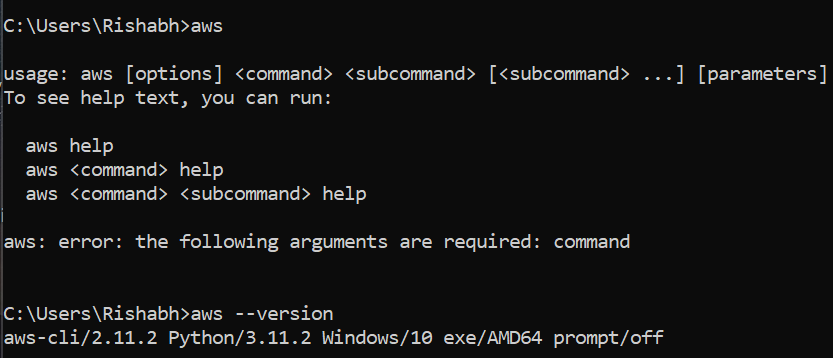
After installing, open your command prompt and type aws you will see the aws cli has downloaded and installed:
STEP 2: Creating an IAM user:
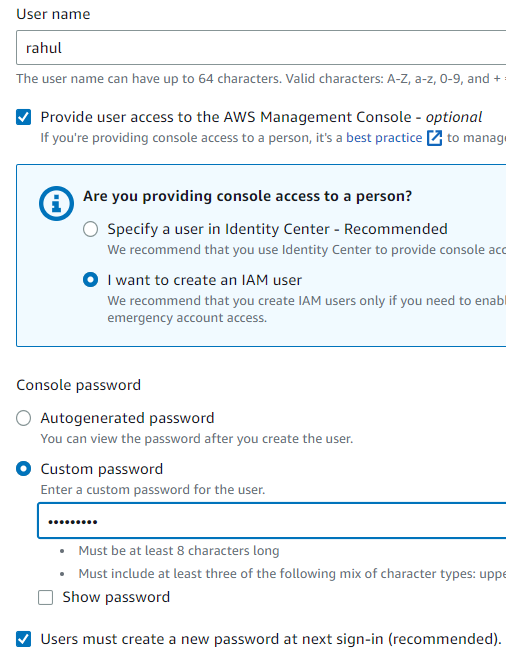
Search for the IAM service -> In the sidebar, click on “Users” -> Enter user details -> Click on “Provide access to the AWS Management Console” This will give the user access to access the AWS console -> Click on “I want to create IAM user” -> create custom password -> Click on “user must create a new password at next sign-in” -> then click on next.


here I have attached a policy for ec2 access, you can add as you want!!
then click on next -> on the next page, click on create user.
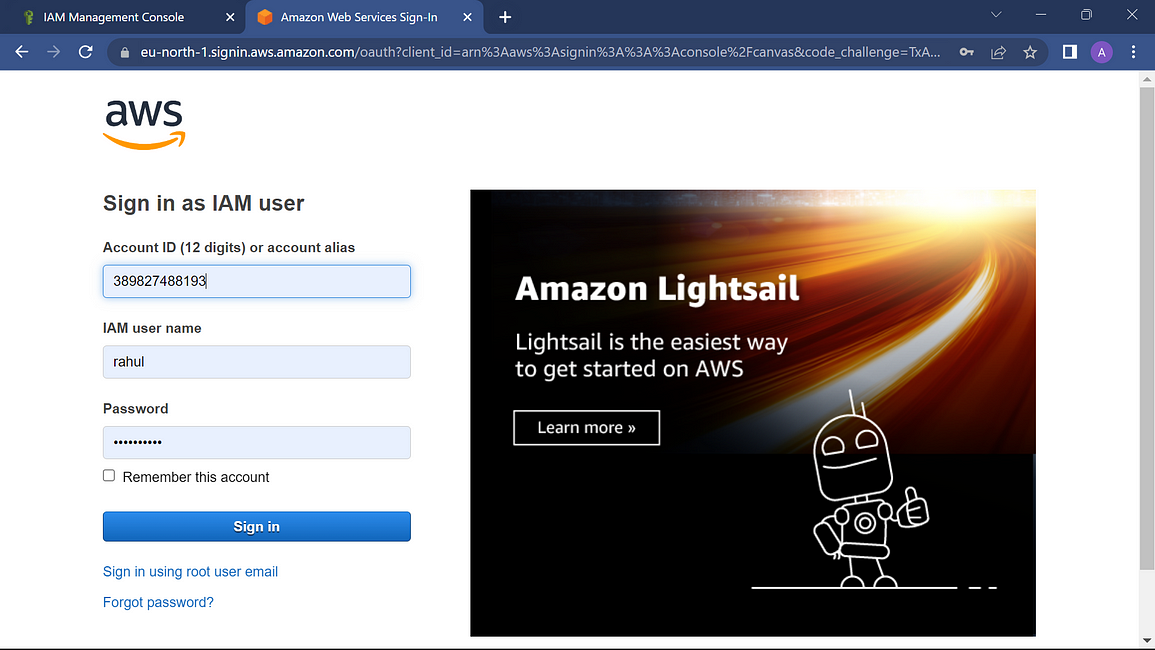
Click on the IAM user and provide the id of the ROOT account because the IAM user is the subaccount of the root user.
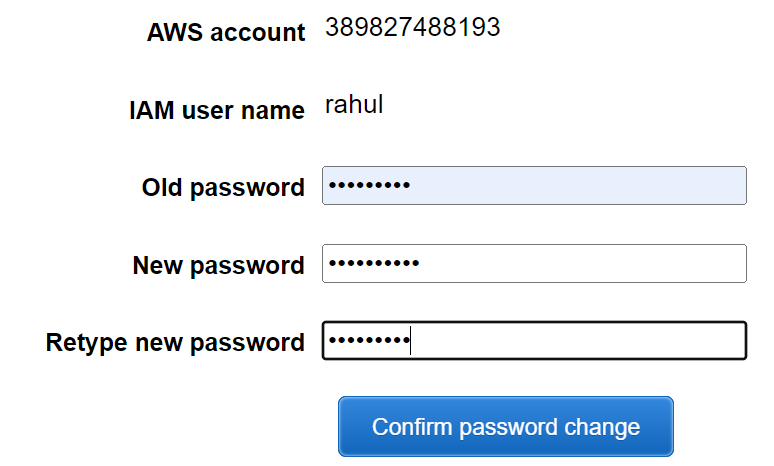
reset the password, and set the new password

You can see the IAM user created in the top right corner:
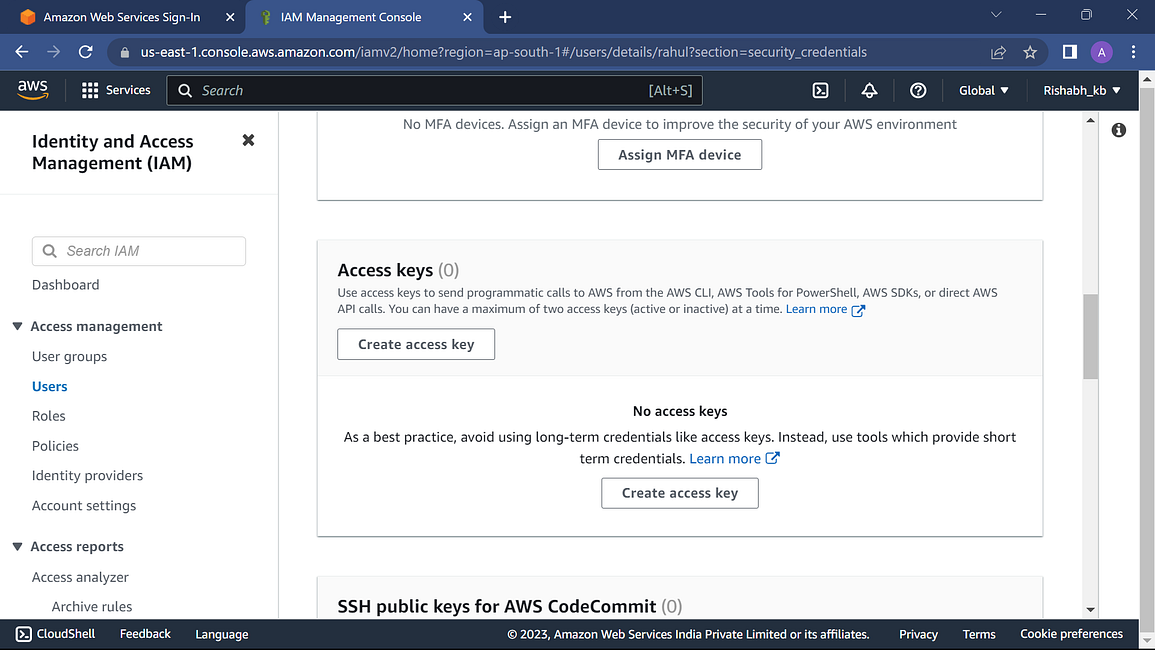
When a user wants to log in programmatically, the user needs an access key and a secret key to log in.
So from the root account -> go to IAM -> select the IAM user -> go to “Security Credentials” -> scroll down and click on create access keys
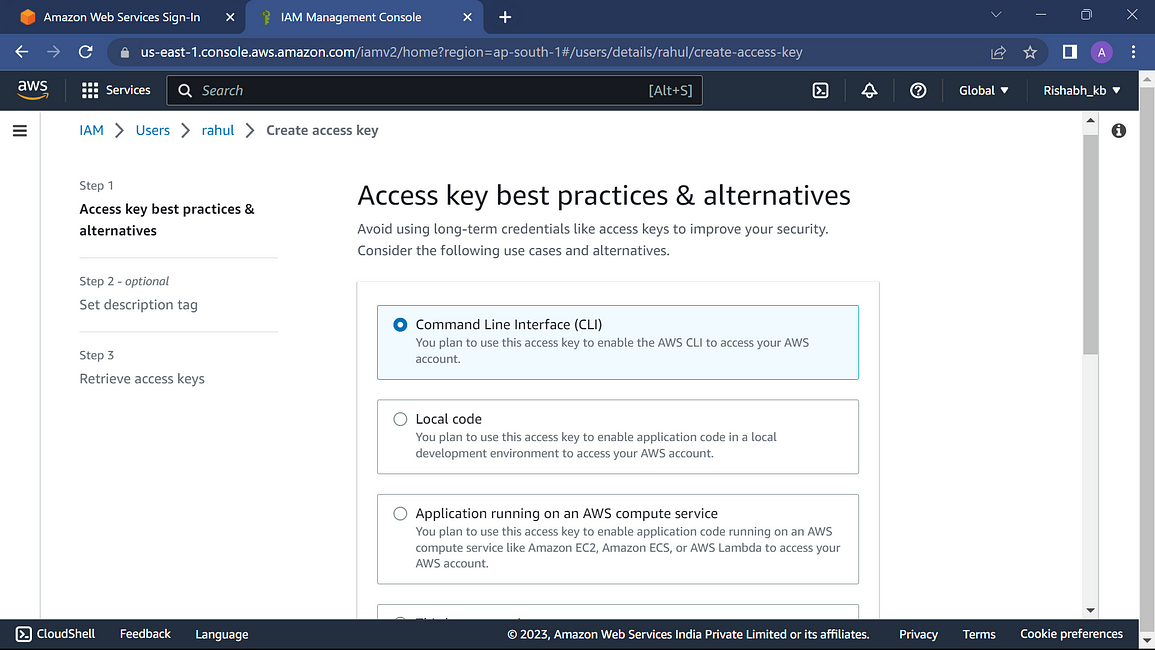
Then select CLI option
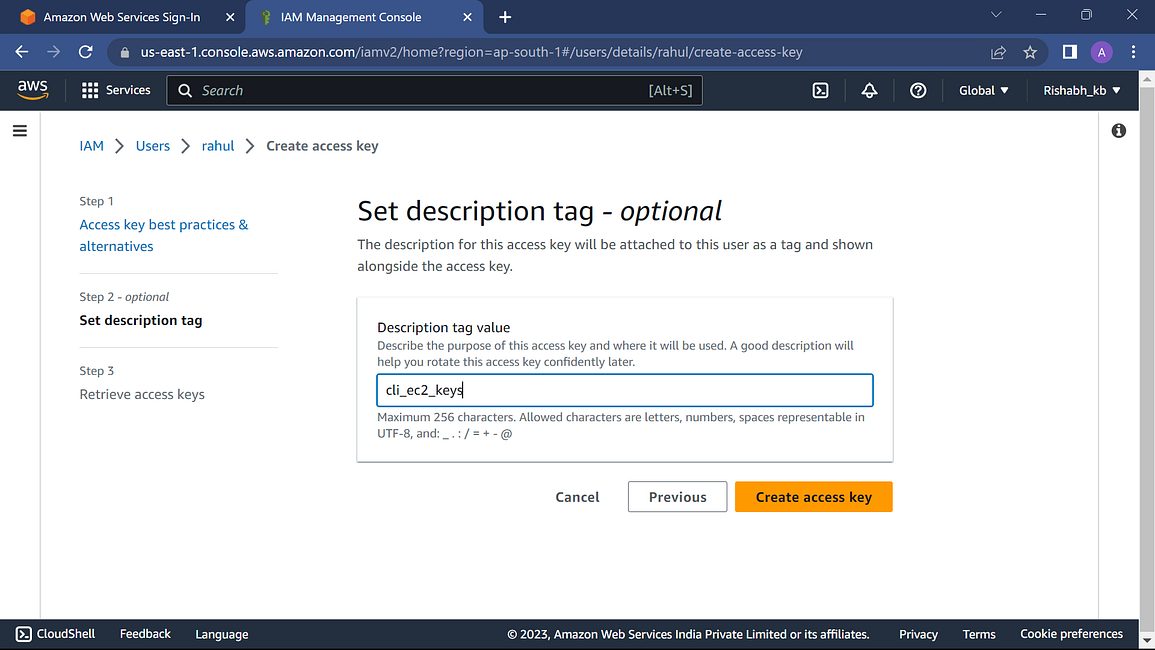
On the next page add keys description
Security keys will be copied only once, copy them carefully.
STEP 3: Configuring the AWS CLI
In AWS CLI, a profile is a collection of settings that allows you to access AWS resources with different credentials or configurations. Profiles help you to switch between different sets of credentials easily. You can create a profile using the aws configure command and specify a profile name, credentials, and configuration settings. You can use the --profile option in your AWS CLI commands to specify which profile to use.
From your command terminal :

Add the details in the required field like giving the access key and secret key. Also, give your IAM user region.
Now, we have logged in to our IAM account from CLI.
- $ aws –help command shows all services which aws supports.
— — — -
Additional Information:
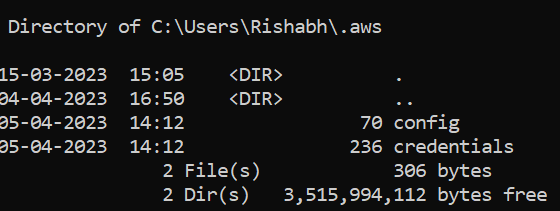
In Windows, there exists a folder at location C:\Users\(username)\.aws which contains two folders, first folder named “config” contains info about profiles, and the second folder “credentials” contains their credentials.
— — — -
STEP 4: Launching an ec2 instance
Creating a key pair: $ aws ec2 create-key-pair --key-name (key_name) --key-format pem --profile (profile_name) > (output_key_file.pem)
Note: here > output_key_file.pem is the file in which key details will be stored.
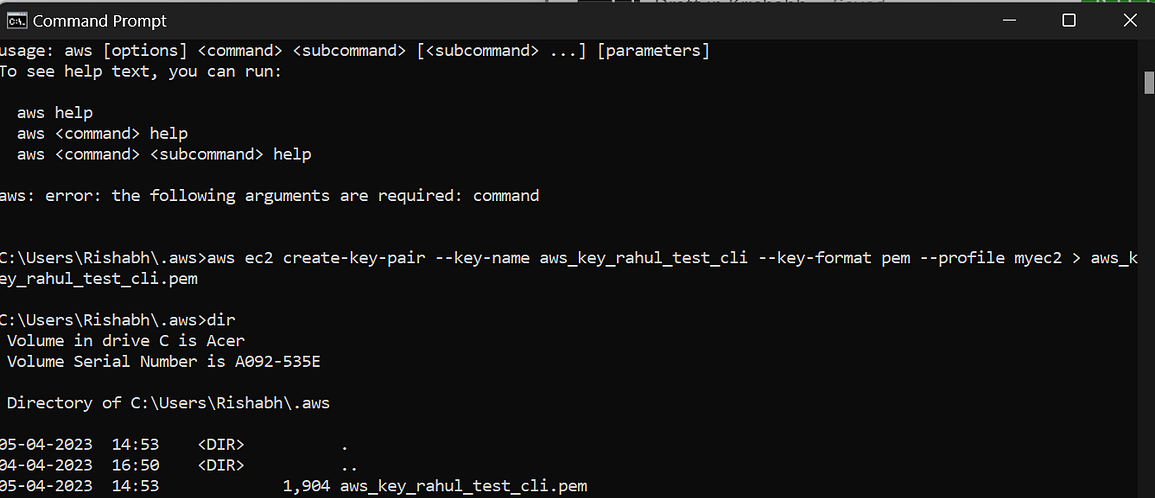
a key file is generated in the same folder
Creating a security group:
aws ec2 create-security-group --group-name (group_name ) --profile (profile name) --description (adddescription)

security group created
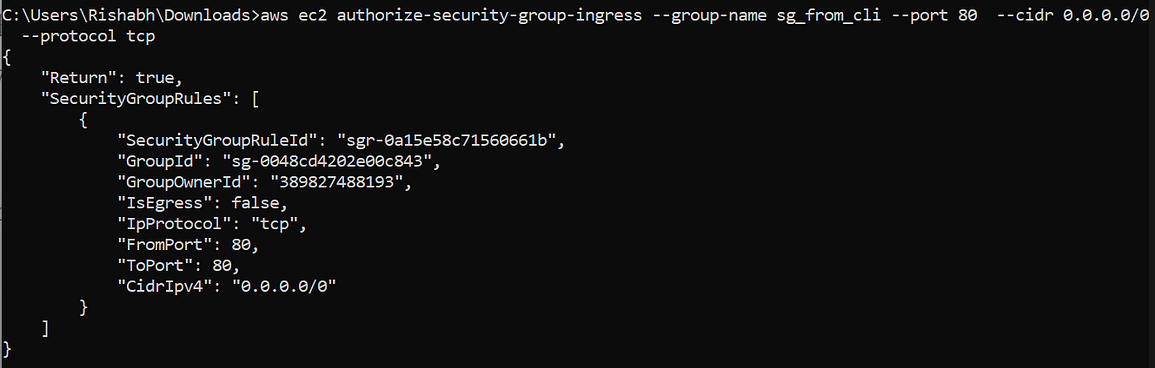
Adding rules to a security group
We are launching this instance as a web server.
Webserver works on the protocol called HTTP which works on port 80.
Note: You can add rules to the security group as whatever you want to add.
Anybody from the internet denoted by IP 0.0.0.0/0 defines any IP in the world. Also referred to as the source.
Anything coming from the internet to the web server it is called Inbound/Ingress.
The group is more like a firewall, by default blocks everything.
Whenever we create a rule, we give protocol and source, this way of giving the range is called CIDR.
$ aws ec2 authorize-security-group-ingress --group- name (security_group_name) --port 80 --cidr 0.0.0.0/0 --protocol tcp
launching the instance:
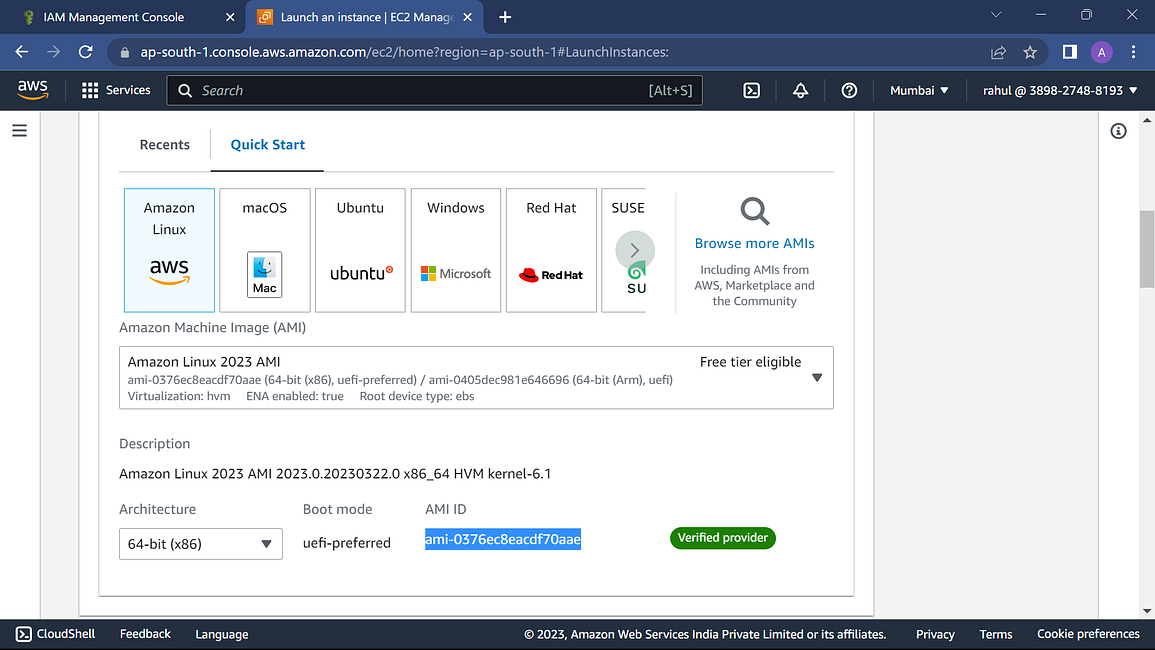
Every OS is given an AMI ID so whenever we launch an instance, internally AWS uses this ID.
You can get AMI ID from the console, go to EC2-> Instances -> launch instance.
Every availability zone belongs to a different subnet(The way through which we select our own Availability zone).
To know the security group Use the VPC service and then choose subnets and choose subnet id.

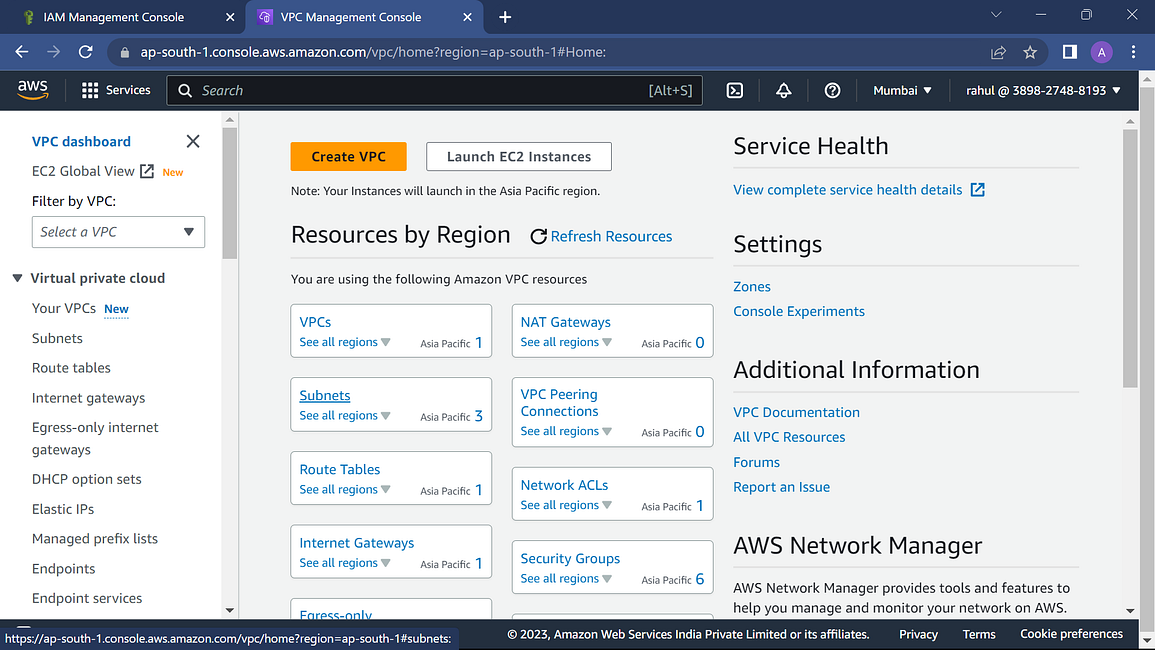
Click on Subnets
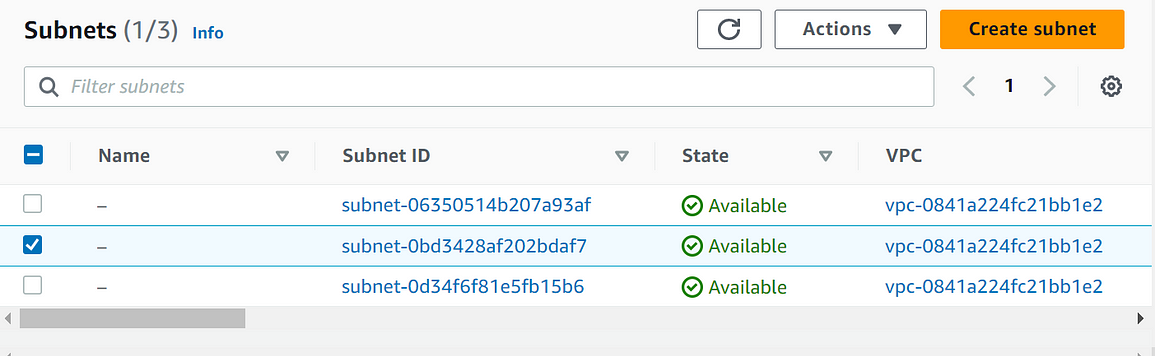
choose Subnet depending on your availability zone
$ aws ec2 run-instances --instance-type (instance_type) --key-name key_name --count (number) --image-id (image_id) --profile (profile_name) --subnet-id (subnet_id ) --security-group-ids (security_group)
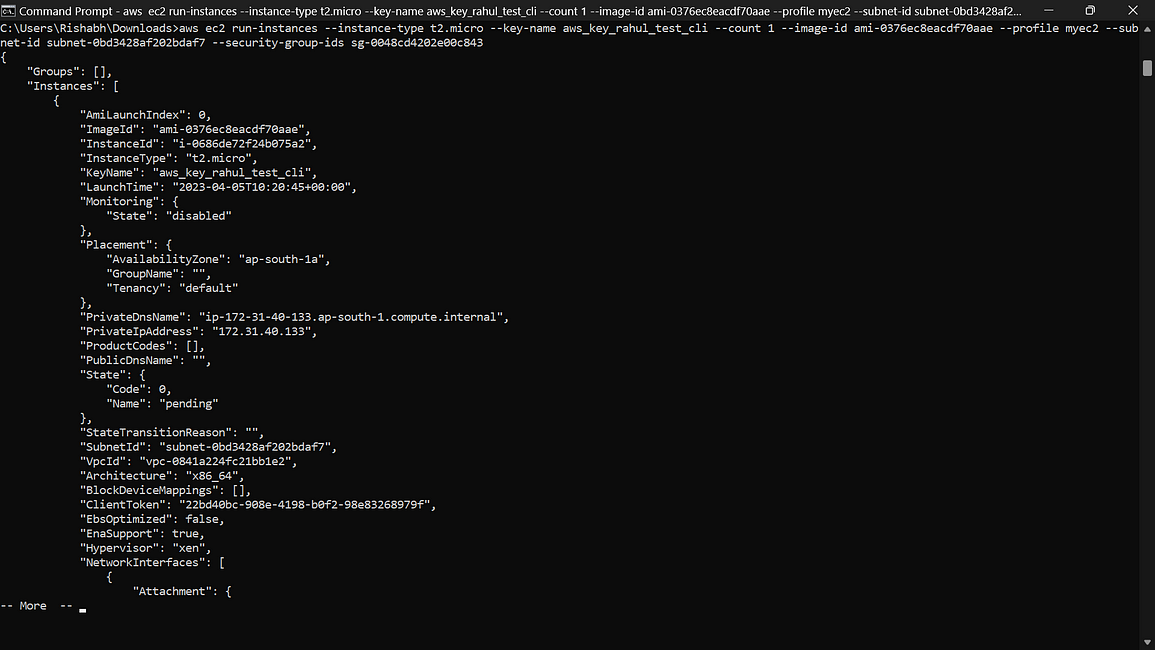

The instance is launched!!!!
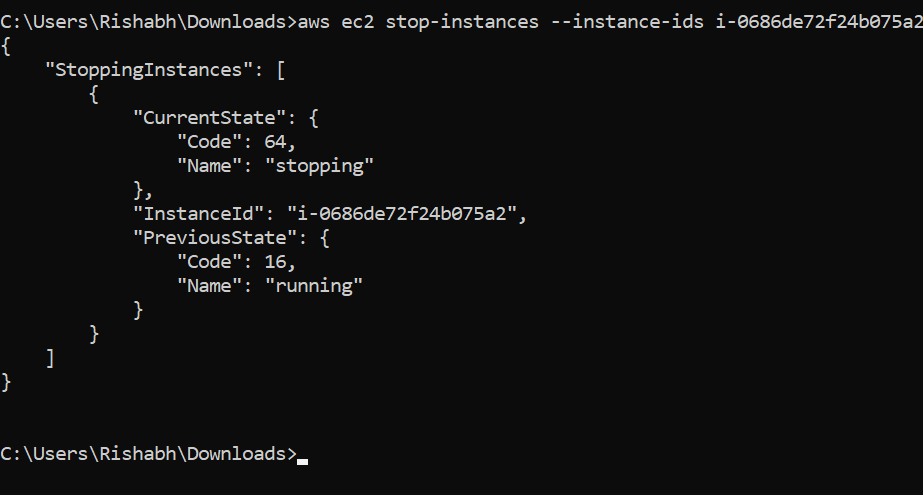
Further, we can also start and stop the instance from the cli:
- Start an EC2 instance:
aws ec2 start-instances — instance-ids “instance_id”
2. Stop an EC2 instance:
aws ec2 stop-instances — instance-ids “instance_id”
I encourage you to take action based on what you’ve learned today. Consider sharing this article with your friends and colleagues.
I would love to hear your feedback on this article! Whether you have positive comments or constructive criticism, your input can help me improve my writing and better serve my readers. Please feel free to share your thoughts in the comments.
Thanks for reading! If you have any questions or feedback about this article, feel free to reach out to me through any of the following channels:
Email: krishabh080@gmail.com
LinkedIn: linkedin.com/in/rishabh-k-9a8b65215
I’m always open to connecting with tech enthusiasts and discussing new ideas, so don’t hesitate to say hi!